Campaign Tracking
Last updated: August 19, 2026
Overview
Campaign Tracking is Gamera's built-in conversion measurement tool. It allows you to define exactly which advertisers and line items you want to track, generate conversion pixels for specific events, and run attribution reports — all from within the platform.
The tool is tied to your organization's Google Ad Manager account, so any advertiser and line item that exists in your GAM account is available to track.
How it works
When a conversion pixel fires on your advertiser's site, Gamera looks back through that user's ad exposure history. If they were served an impression from one of your tracked line items within the attribution window you've defined — whether that was yesterday or 60 days ago — the conversion is attributed to that campaign. No click is required at any point. This makes it possible to measure the influence of display campaigns that drive awareness and intent, not just direct-response clicks.
What it stores
Gamera only tracks creative, advertiser, and line item IDs for the items you explicitly activate. Unselected line items generate no data and incur no storage overhead.
Setting Up Tracking
Tracking is configured per advertiser. You choose which advertiser to track, select the specific line items you want to include, and define how far back the attribution window should look.
1. Link your GAM and Gamera accounts
In order to utilize this tool and configure Advertiser/Line Items for tracking, your Gamera account needs to be linked to GAM. Directions on linking can be found here: 📄 Adding Gamera Service Account to Google Ad Manager
2. Select an Advertiser
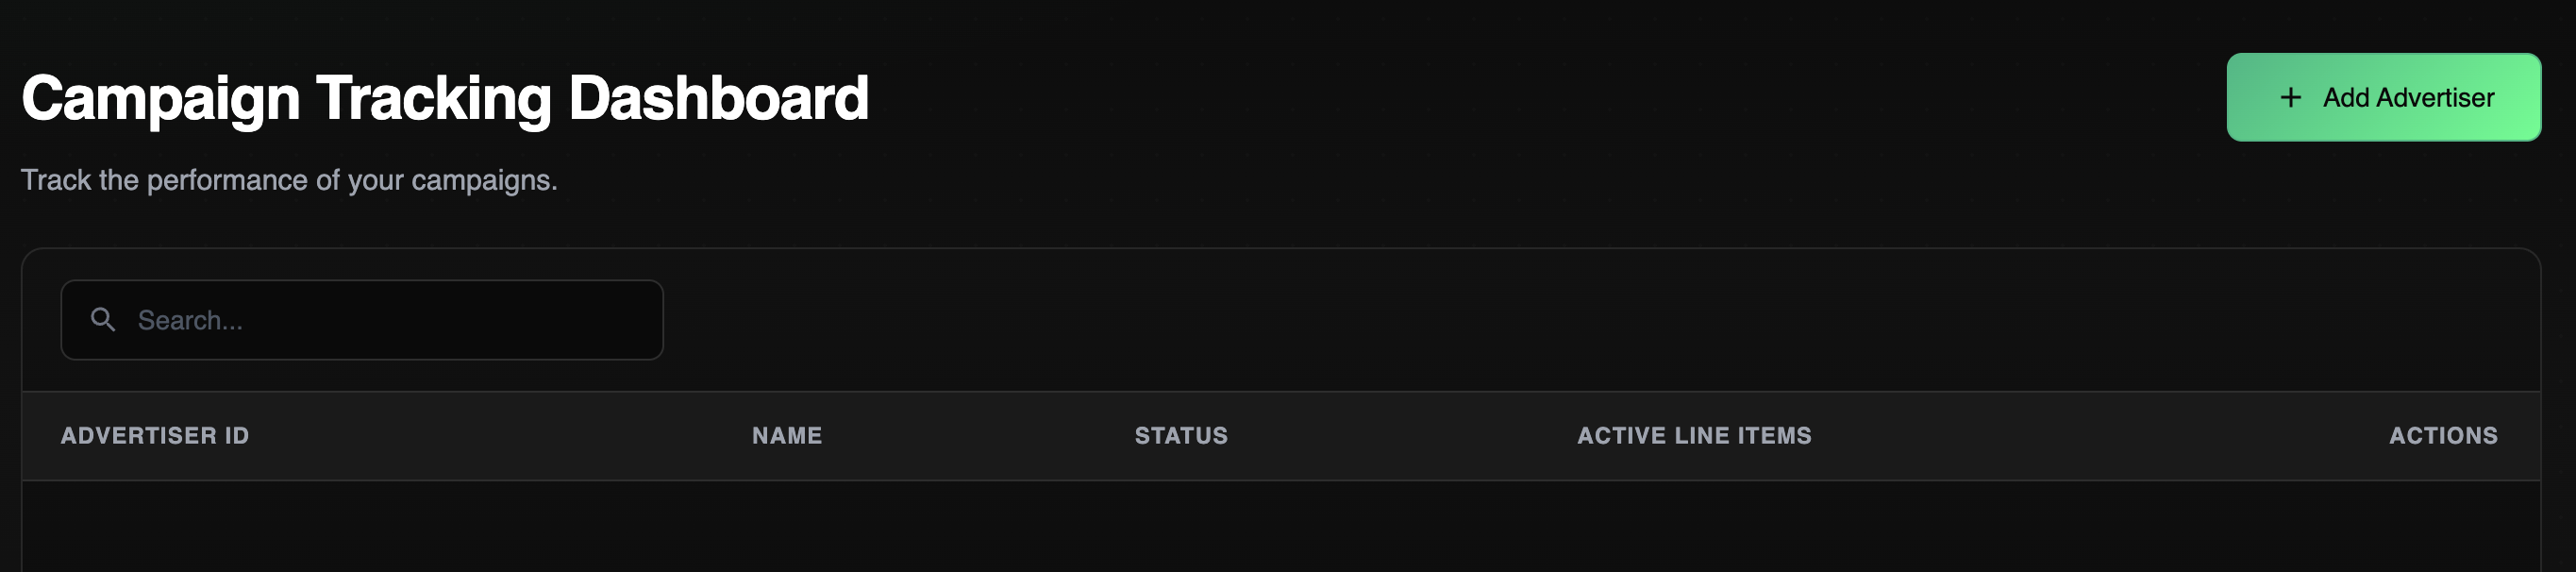
Click Add Advertiser and choose from the list of advertisers synced from your GAM account. Each advertiser is configured independently.
3. Select Line Items
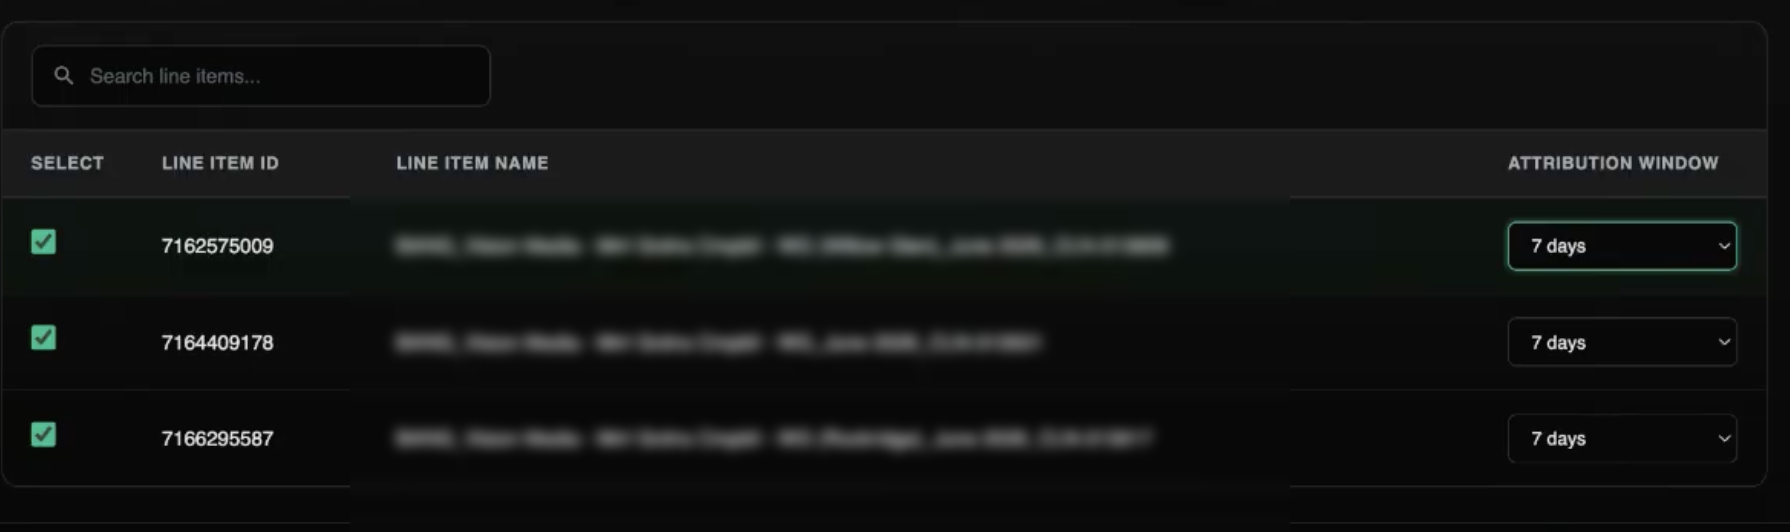
Once you've chosen an advertiser, select the specific line items you want to track. You don't need to include every line item — only activate the ones relevant to the campaigns you're measuring. Additional line items can be added later without any changes to existing pixels.
No line items appearing? If an advertiser shows no line items after selection, they likely only have archived items in GAM. The tool filters for active line items by default. Check the advertiser's GAM configuration if you expect to see items that aren't appearing.
4. Set the Attribution Window
Define a post-view attribution window of up to 90 days. This tells the system how far back to look when determining whether a converting user was exposed to an ad from one of your tracked line items.
For example, a 30-day window means a conversion is attributed to a campaign if the user saw a relevant ad within the past 30 days — regardless of whether they clicked it.
Creating Pixels
Once your line items are configured, you can generate conversion pixels to track specific events on the advertiser's website. Each pixel corresponds to a single event you want to measure.
1: Name the pixel and set its type
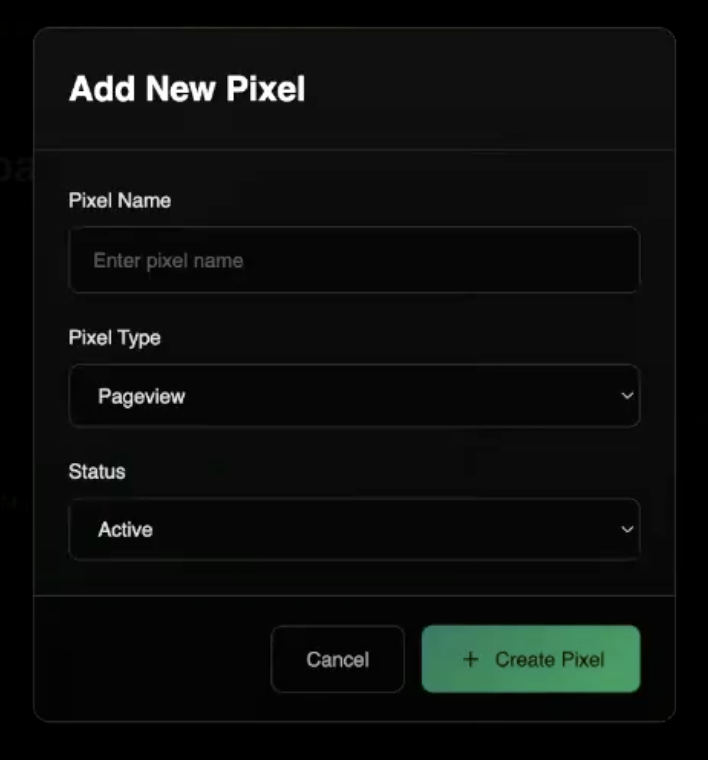
Within the desired Advertiser, click + Add New Pixel

Configure the pixel as follows:
Pixel Name: give the pixel a name that matches the event you're tracking — for example, Landing Page or Checkout Page.
Pixel Type: Pageview, Signup, Purchase
The Purchase pixel includes an optional
revenueplaceholder if the advertiser would like to pass in the transaction value at the point of conversion.
Status: Active
2: Copy the generated pixel
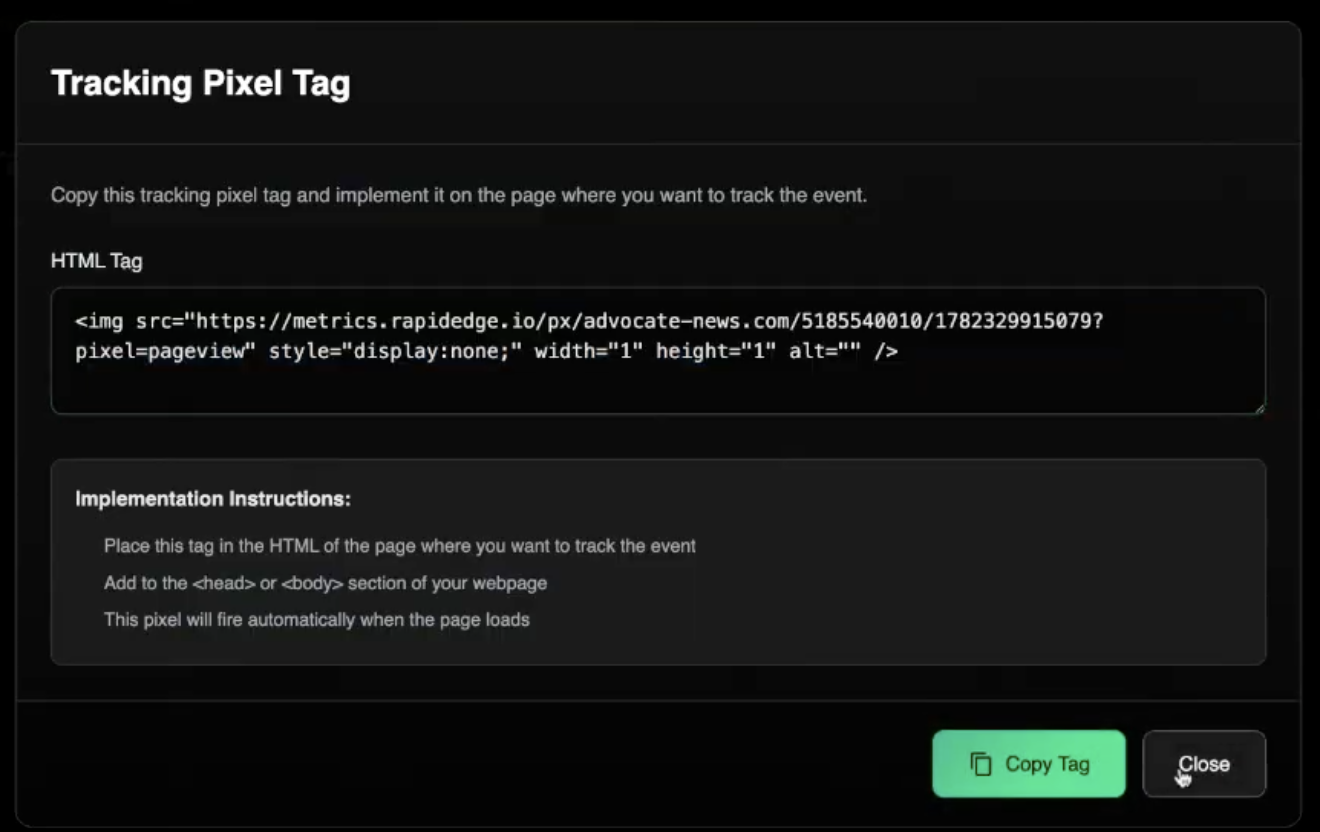
After naming and saving, the tool generates a pixel snippet.
3: Implement on the advertiser's site
Place the pixel on the advertiser's website, on the page where the conversion will take place. Once it's live, data starts flowing automatically — no further action is needed in Gamera to activate tracking.
Pixels don't need to be regenerated. If you update a tracking configuration — adding new line items, adjusting the attribution window — you do not need to create new pixels. Existing pixels continue to work without any changes on the advertiser's side.
Running Attribution Reports
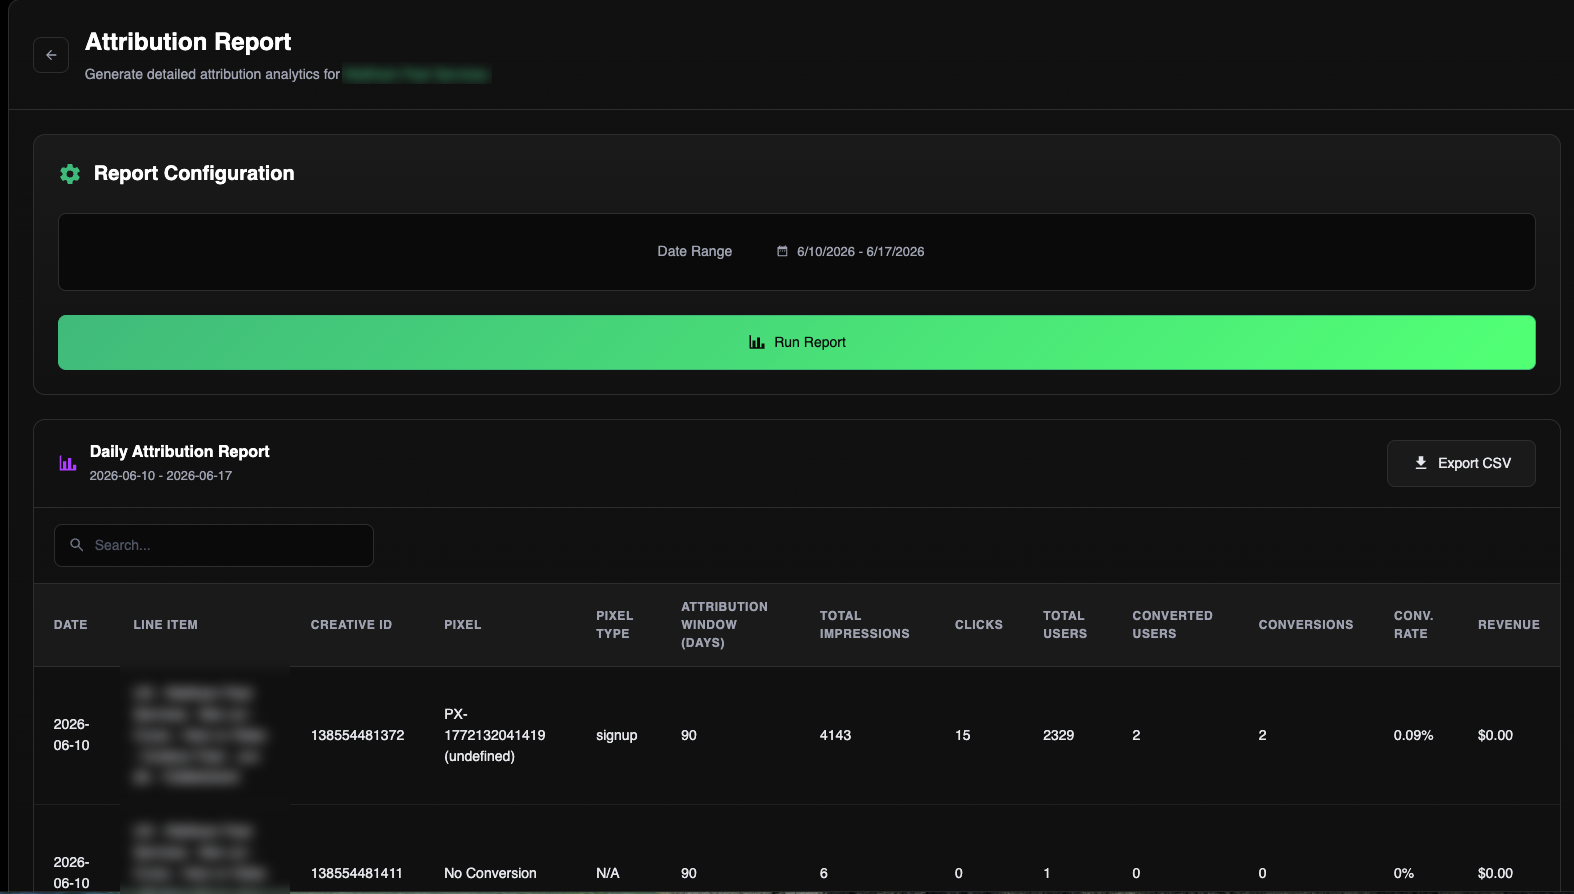
Reports are generated per advertiser and show how tracked campaigns are performing against the conversion events you've defined.
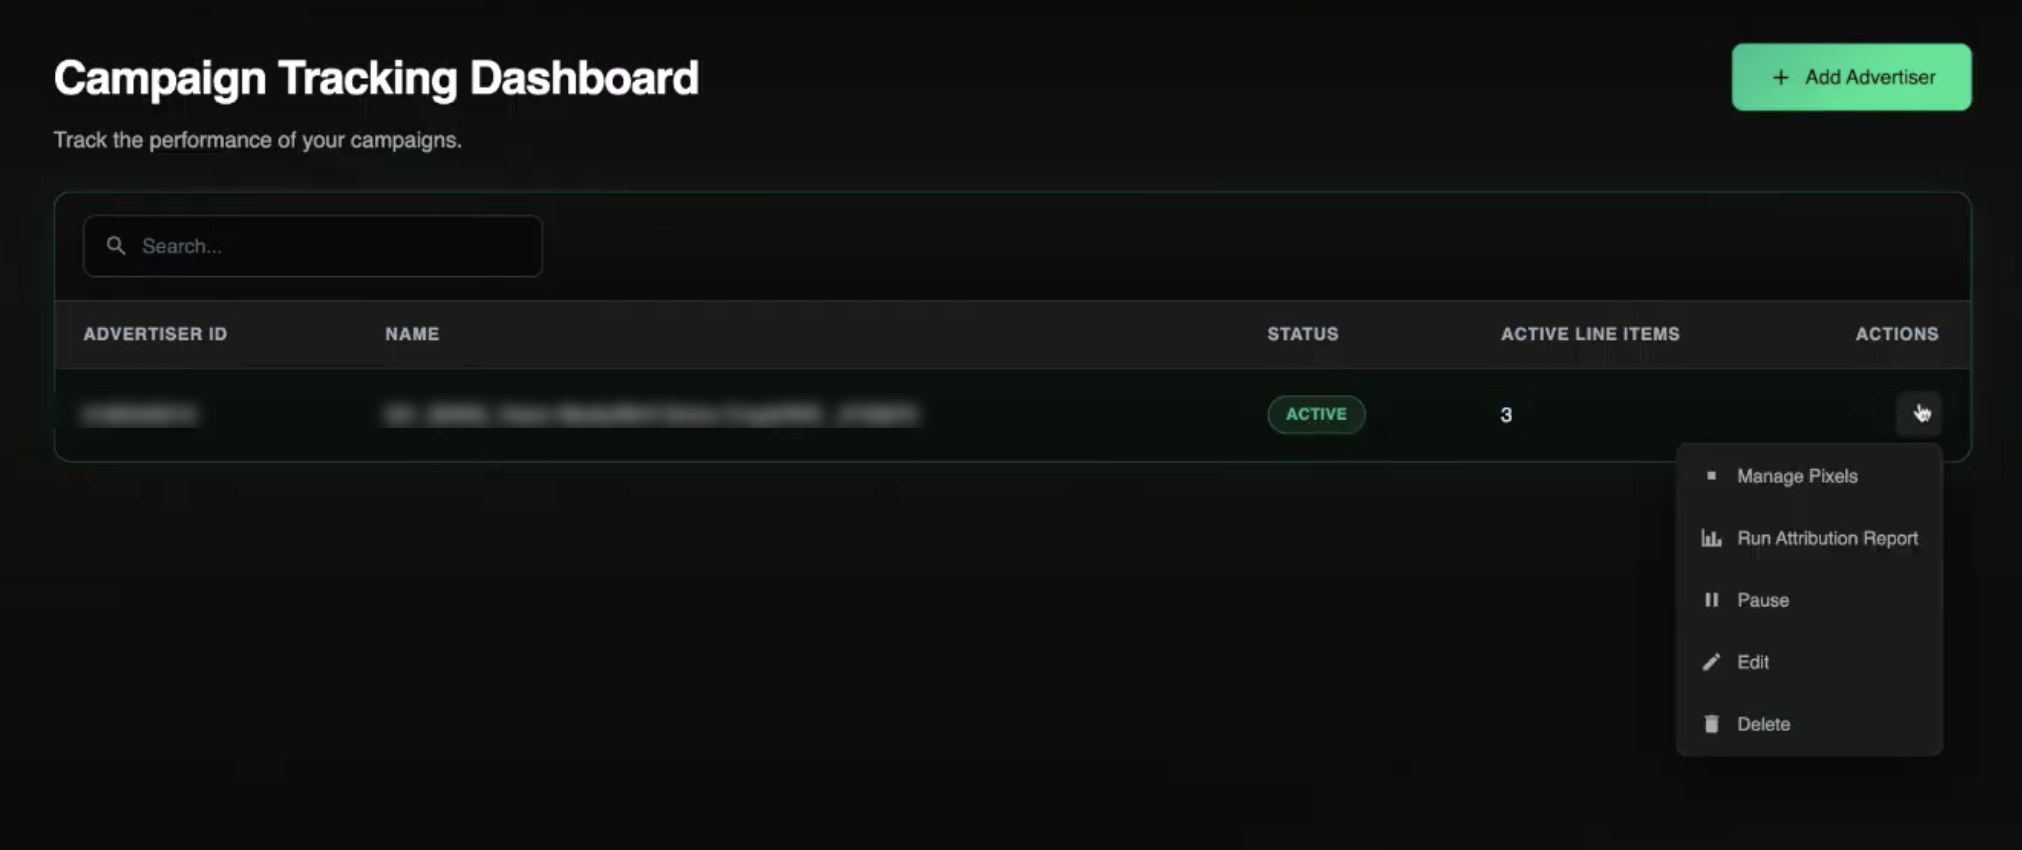
In the Advertiser list, open the ⋯ menu next to the advertiser you want to report on and select Run Attribution Report.
The report will generate inline, and can be downloaded as a CSV
Editing Configurations
To modify an existing tracking setup — adding line items, removing them, or adjusting the attribution window — open the ⋯ menu next to the Advertiser and select Edit. The same menu also lets you Pause or Delete an advertiser configuration entirely.
No pixel changes needed after edits. Updating a configuration takes effect immediately. Your advertiser does not need to re-implement anything on their end — the pixels already in place will reflect the updated settings automatically.